Creating a new project with ArchiSnapper is easy. Projects are created from the online account only.
Quick links to:
Create project
Go to your online ArchiSnapper account on your computer and log in with your ArchiSnapper email and password. Click on projects >> new project:

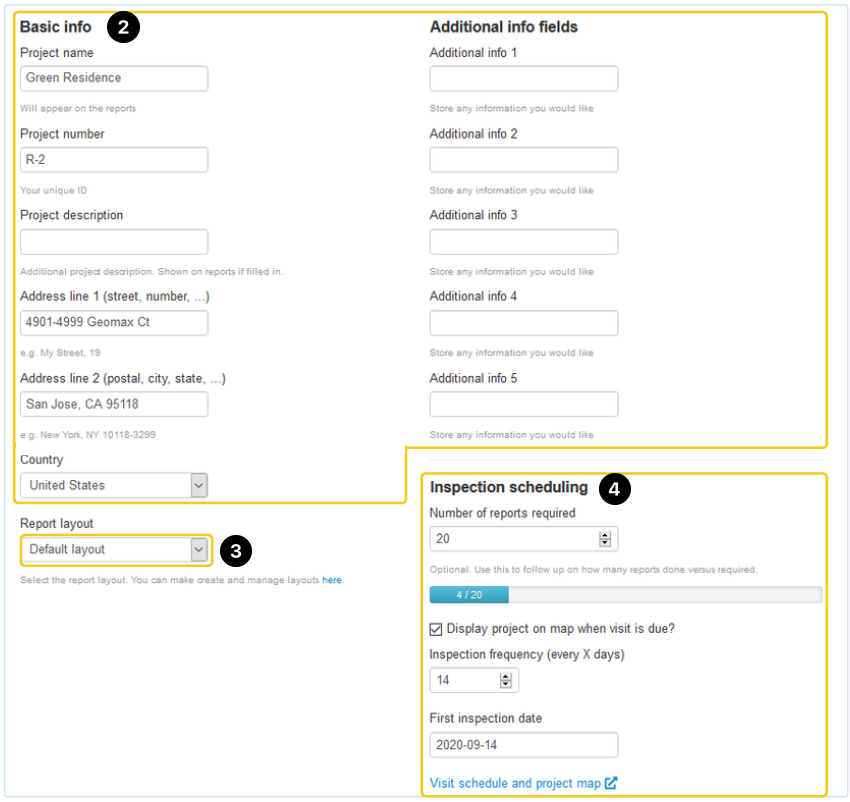
Fill out the project details
Mandatory fields are: "Project name" and "Project number".
The project name, number, and address will be shown in your reports.
The additional info fields can be shown in your reports, by using variables in your layout template.
Select a report layout for the project. You can still change the layout template when editing a report online.
Add inspection scheduling data if you want to monitor actual vs required reports, or if you want to display projects on a map when a visit is due
Add contacts
After saving the project, you will be automatically directed to the contacts page of your new project.
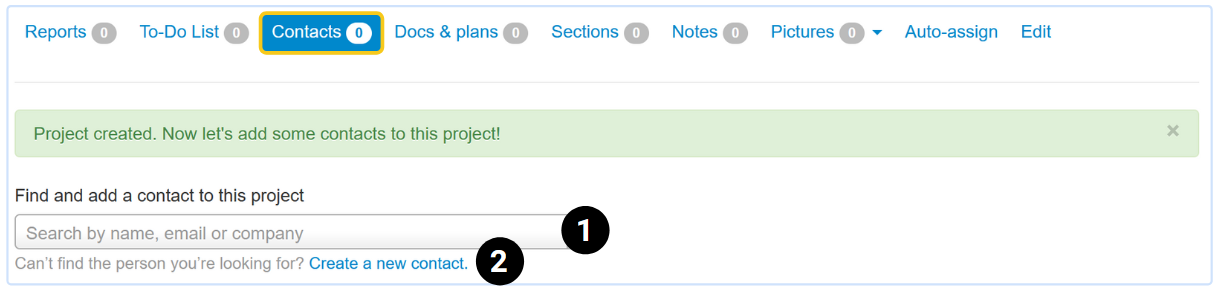
Select a contact from the central contact list in your account. Search by name, email, or company
Or, create a new contact manually (or import it from Excel, Gmail, Yahoo, or Outlook).
Contact Settings
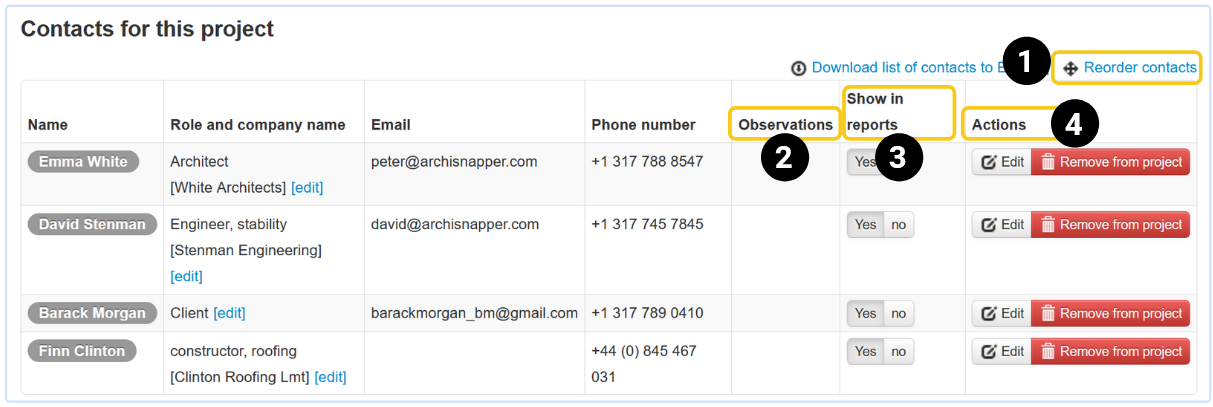
Change the order of your contacts with drag and drop: this is also the order in which they will be displayed in the contacts table.
You'll see an overview of the NOT OK and OK items per contact.
Choose if you want to display a contact in the contacts table of the field reports for the project.
Edit or remove a contact from this project.
Add Documents
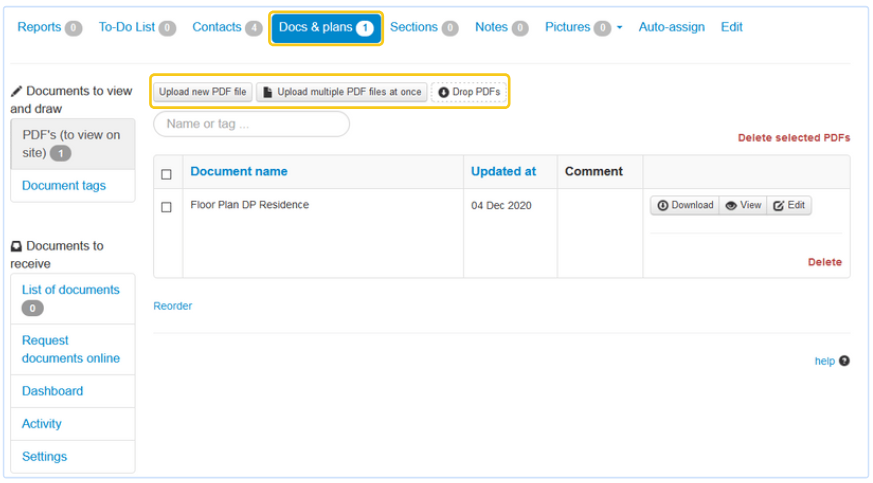
This is the page where you can add documents like floor plans. The documents will be available on your smartphone or tablet with the ArchiSnapper app, so you can view them on-site, annotate them, and add location pointers. Here you can read more on working with docs and floor plans.
It is also possible to request documents from your contacts, via 'documents to receive'. They can upload the documents so you can review them. Read more about this here.
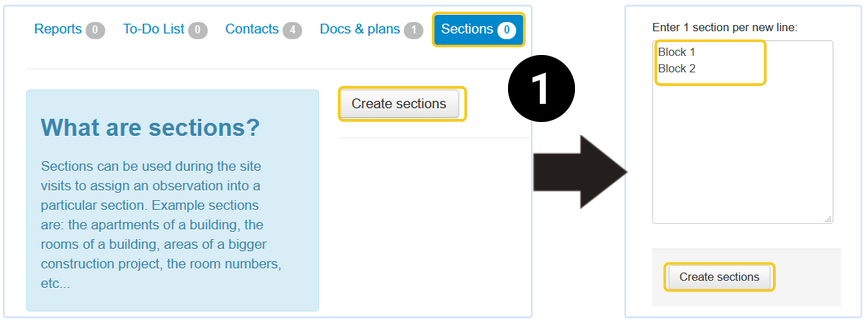
Sections
You can define project-specific sections. This can be useful to define the different lots or units within a project (e.g. app 1, app 2, ...).
You can then assign a section to your observations.
Here is how it works:
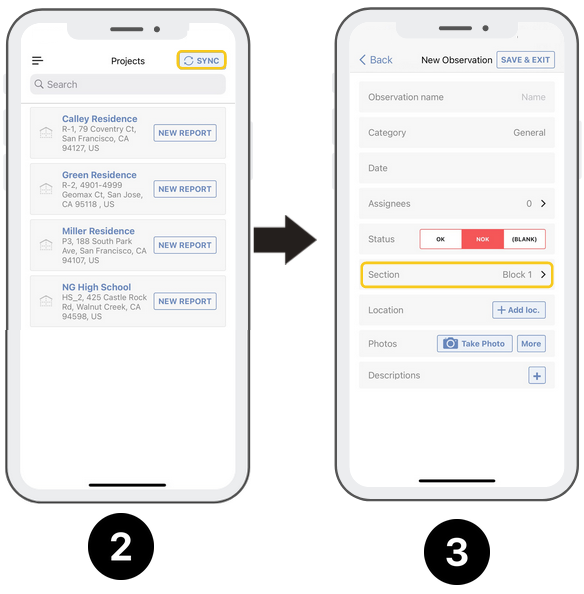
1. Create the sections in your online account
2. Sync the app.
3. Assign a section when creating or editing an observation.
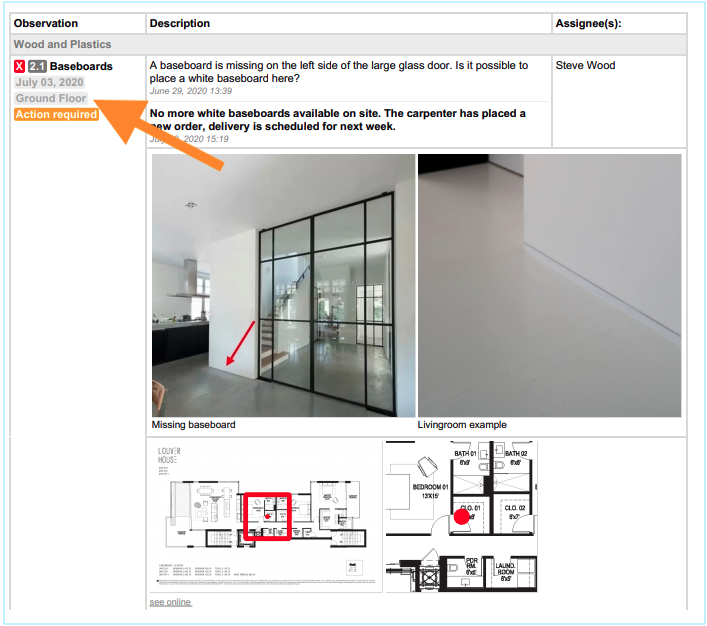
The section will be shown in the field report or To-Do list, next to or below the observation.
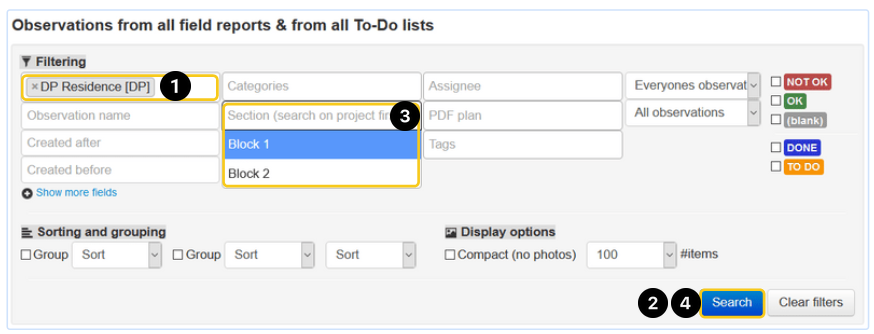
And you can filter on sections in the all observations overview:
Select the project.
Click on "search".
Select the relevant sections.
Click on "search".
TIP: If you add observations directly from a floor plan with the ArchiSnapper app you can choose to reuse the category & section of the previous observation. More info on how to set this up in this help doc.
Project pictures
On this page, you can view all photos of the project, and also add photos and download all photos.
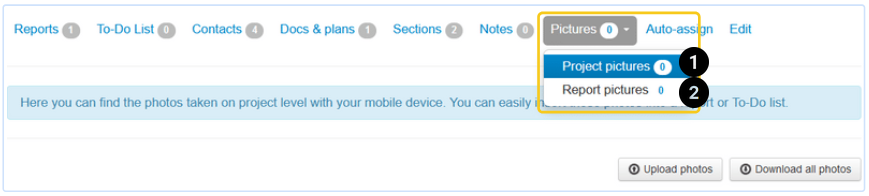
The Report pictures include all the photos from field reports or the To-Do list of this project.
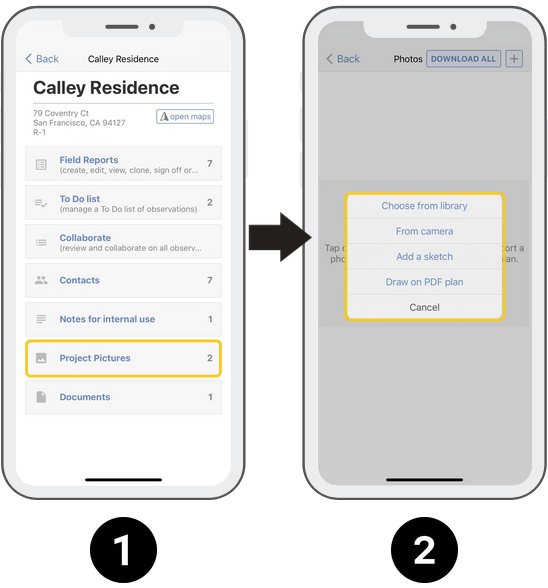
The Project pictures are the photos you take with your tablet or smartphone, on project level. After syncing these photos appear under 'Project pictures' in the online account:
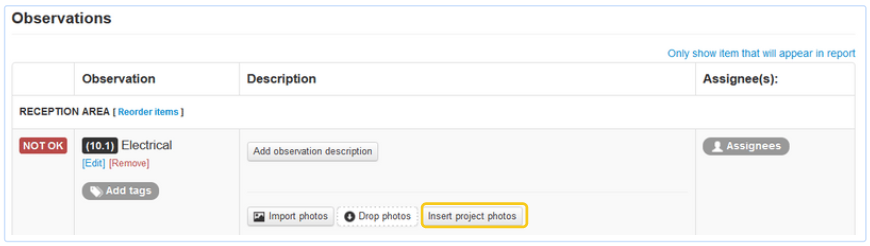
Afterward, these photos can easily be inserted into observations in a field or To-Do list, see the button 'Insert project photos':
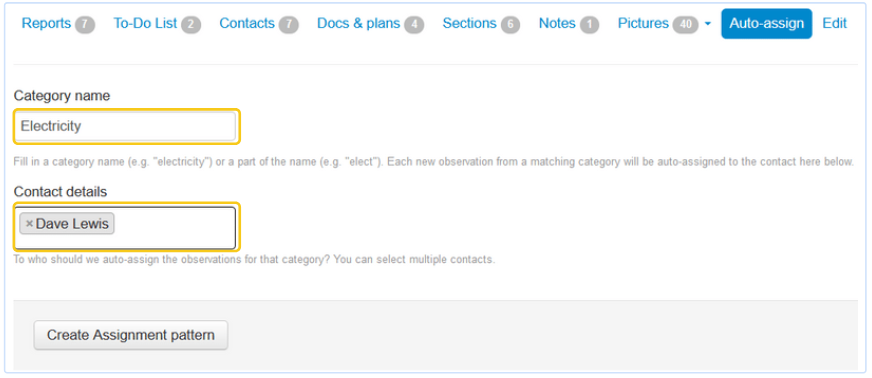
Auto-assign observations
You can automatically assign observations to contacts, based on the category of the observation:
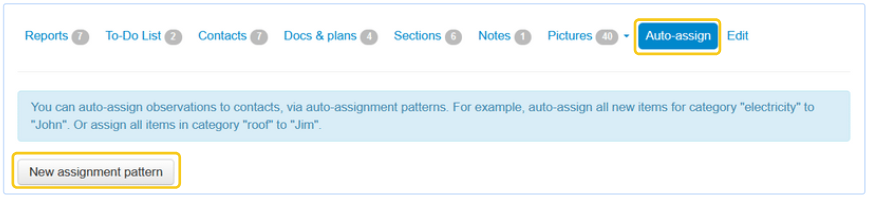
For example, auto-assign all new items for category "electricity" to "Dave Lewis".
Add as many assignment patterns as you want. You can modify or delete them at any time:

Questions? Support@archisnapper.com.