Quick links:
How does a checklist work?
With ArchiSnapper, you can create reports based on categories or checklists.
Both categories and checklists are managed from here online.
Specific to checklists is that you can predefine a list of items to review on-site. Only the items that you edit (e.g. add a photo, change the status, add a description, etc) during a site inspection will be shown in the report. Items that are not touched during the inspections will not be displayed in the PDF report.
If you already have a checklist and want to create your first checklist-based inspection report, read this help doc.
How to create a checklist?
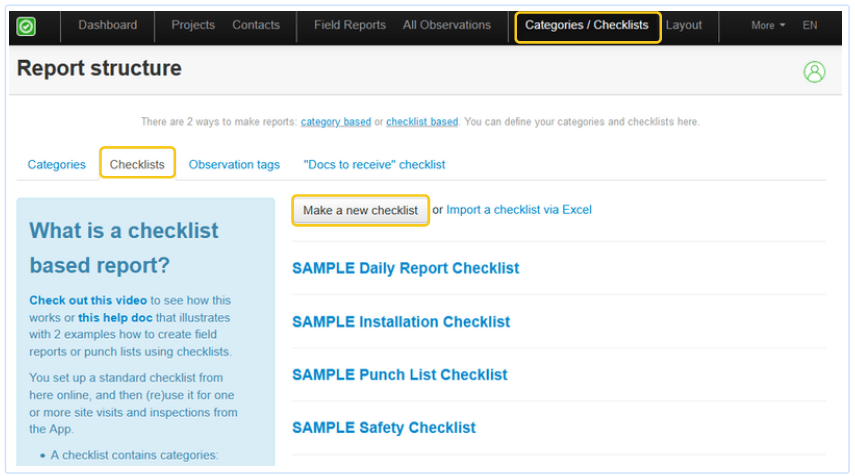
In the online account, go to "Categories / Checklists".
Click on the second tab "Checklists".
Click on "Make a new checklist".
Give the checklist a name and click "Add Checklist".
Create a category within the checklist. E.g. in the case of safety, this can be 'working at height', or 'personal protective equipment'. For a punch list checklist, this could be 'Room 1', 'Room 2', 'Kitchen', ...
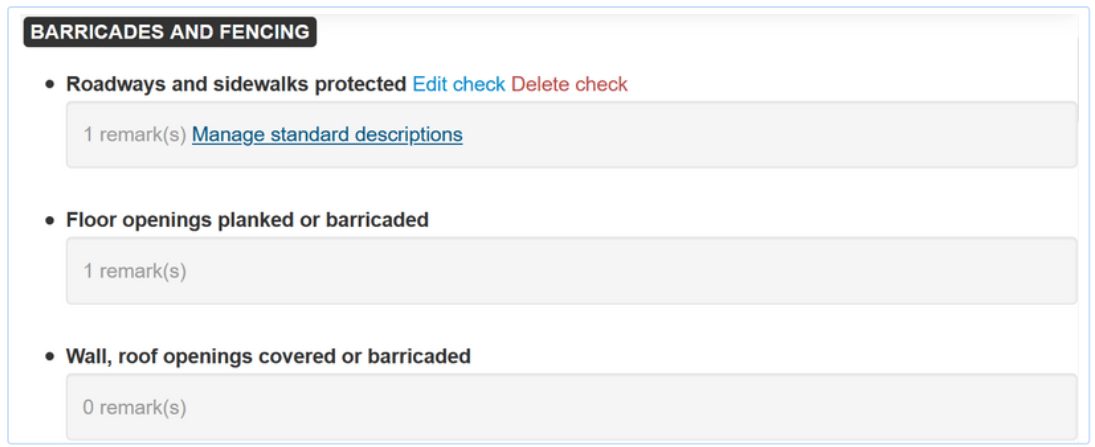
Add checklist items to the category. These are the items to be reviewed on-site, for example, 'railings', or 'helmets', for a safety checklist. Or, 'touch up paint' for a punch list checklist.
For each item, you can then also define a list of standard descriptions, describing a list of possible corrective actions. For the item 'handrails', a possible standard description could be: "Please install handrails", so you can select it when reviewing the item 'handrails'. Read more about standard descriptions.
TIP 1: You can also include categories without any predefined checklist items, for example, a category ‘general observations’.
TIP 2: When creating a field report, you can still add new items to any category, so you are not limited to the predefined items in the checklist.
Who can create a checklist?
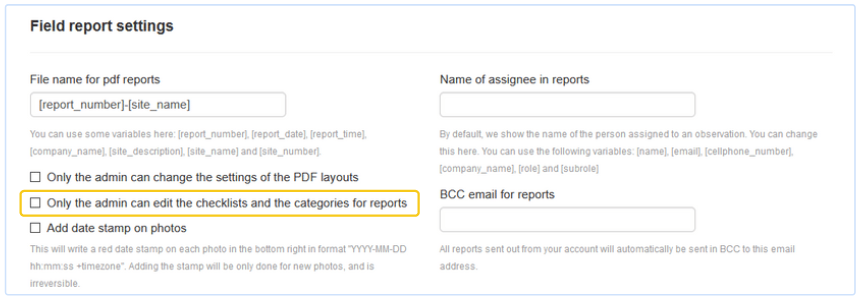
There are two options in the account: anyone can create and modify checklists, or only admin users can.
If you want to adjust this setting, go to More >> Account Settings, and check the option "Only admin can edit checklists and categories".
Examples of checklists
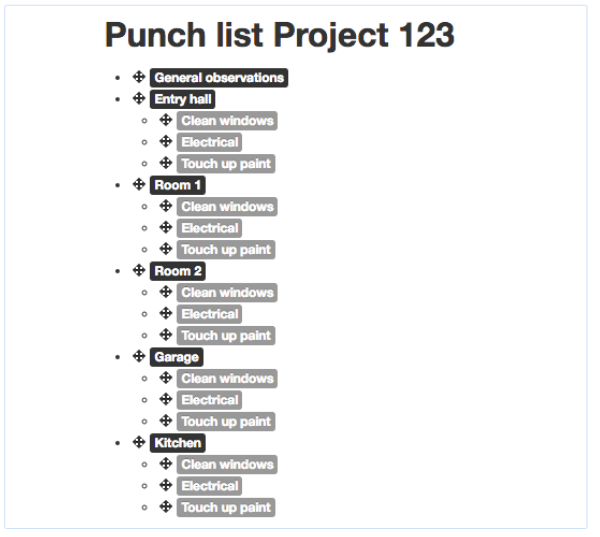
Project-specific checklists
In this case, the categories in the checklist are the specific units (or locations, lots, sections, ...) for this project. For example, the entry hall, room 1, room 2, garage, kitchen, ...
For each of these units, we can then predefine items that we want to review during our visit, for example, clean windows, electrical, or touch-up paint.
Here's an example of such a checklist:
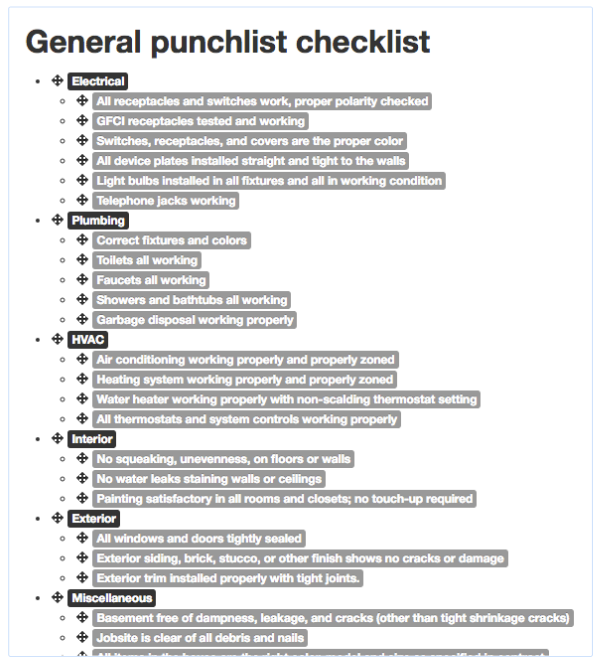
General checklists
Another way of working is to create general checklists that you use across projects. A checklist per project type, discipline, or type of inspection (e.g. safety inspections, punch lists,...). You can then use these standard checklists for all projects.
Here's an example of such a "general" punch list checklist:
Also read:
Questions? Support@archisnapper.com.