In this help doc, you can read how to request documents from third parties, like for example as-built plans.
1. Request documents via email
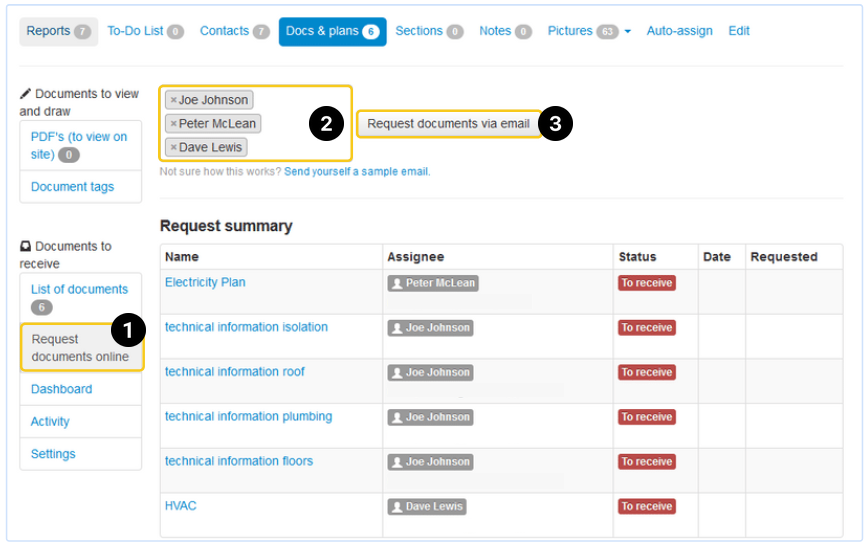
After you have created the list of documents to receive, you can start requesting these documents from the parties involved.
In the "docs & plans" section of your project, navigate to the "Request documents online" tab.
Select the contacts from whom you want to request documents.
Click on "Request documents via email".
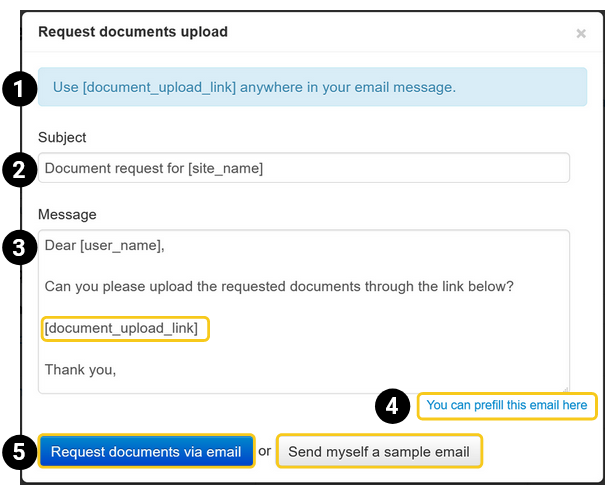
You will now see a pop-up where you can draft the email to your contacts:
It is important that the variable [document_upload_link] is in your email. This is where the recipient will see the link to upload the requested documents.
Fill in a subject line.
Fill in the body of your e-mail.
You can also predefine an e-mail template.
When your message is ready you can send it, or first send a test email to yourself.
Your contact will arrive at the page below after clicking on the link in the email. The contact can now upload the requested documents.
On this page the requested files can be "dropped":
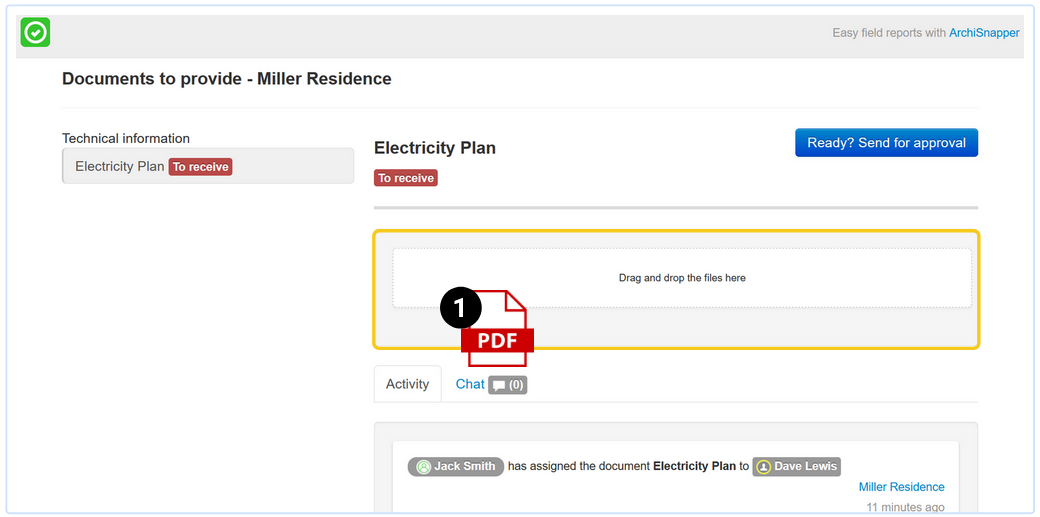
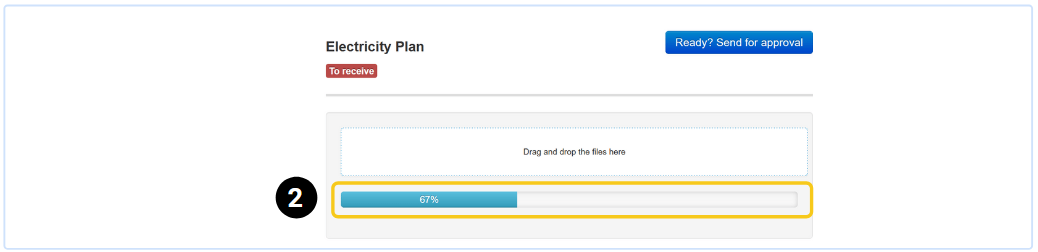
One or more files can be selected and added. The status bar shows the progress of the upload.
If the file is loaded properly it will appear above the drag&drop zone. Additional files can be added if necessary.
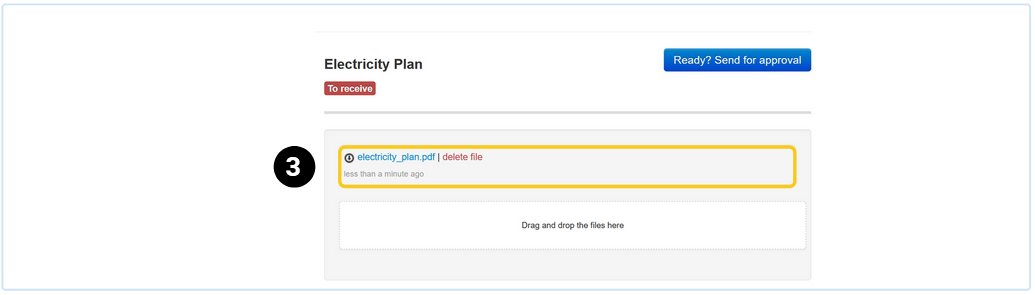
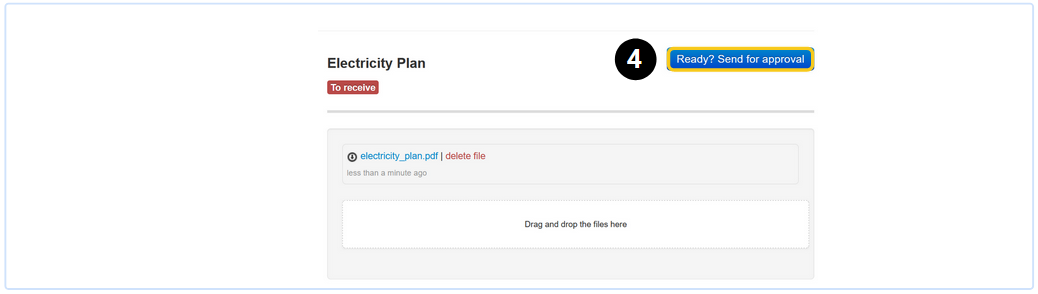
When all necessary documents are uploaded, they can be submitted for approval by clicking on the blue button.
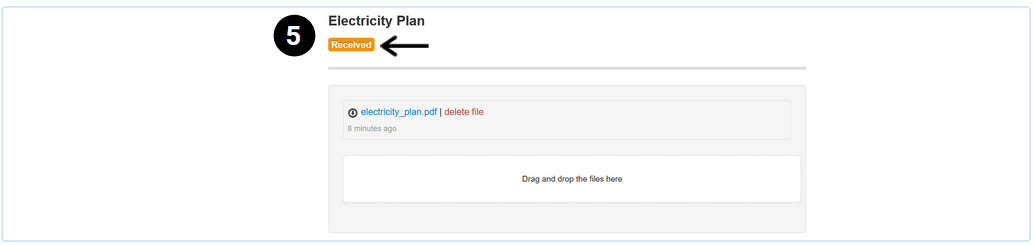
The status changes from "to receive" to "received". The label will turn from red to orange. If you want to change the name of the status, you can change this in the "document settings".
2. Download and approve requested documents
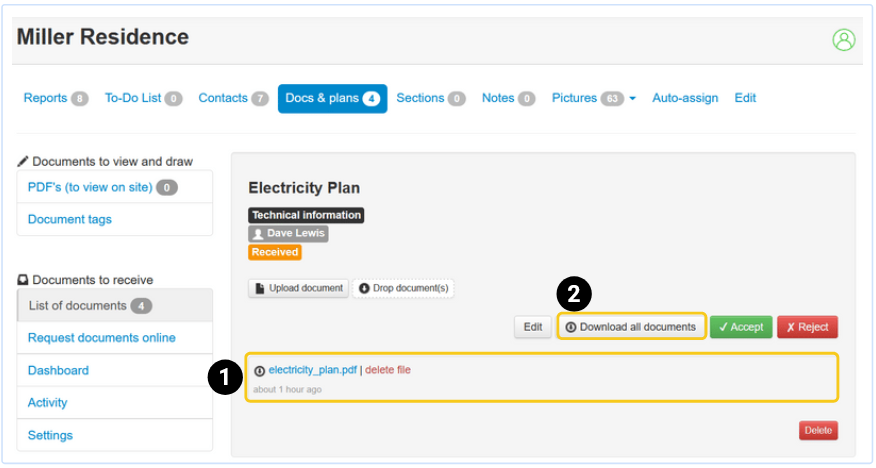
1. Go to the "docs & plans" section of your project, click on "List of documents" in the left column.
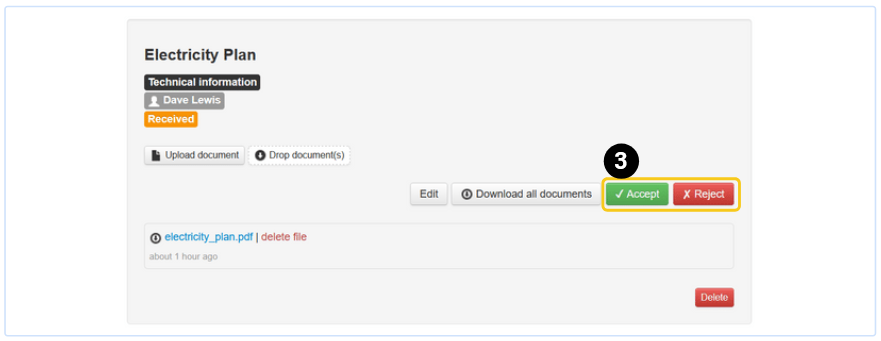
2. Once a file has been submitted you will see the status label change from red to orange in the list of documents to be received. Click on the "Accept or reject" button.

Then, you'll see the window below. Here you can:
View the uploaded documents by clicking on the file name.
Or download all the files for this document.
After you have reviewed the documents, you can:
Approve: your contact will receive an email notification, and the status will be changed to "approved".
Reject: your contact will receive an email notification, and the status will be changed to "to receive" again. If you want to, you can leave a message in the chat window below, to give more feedback on why a document was rejected.
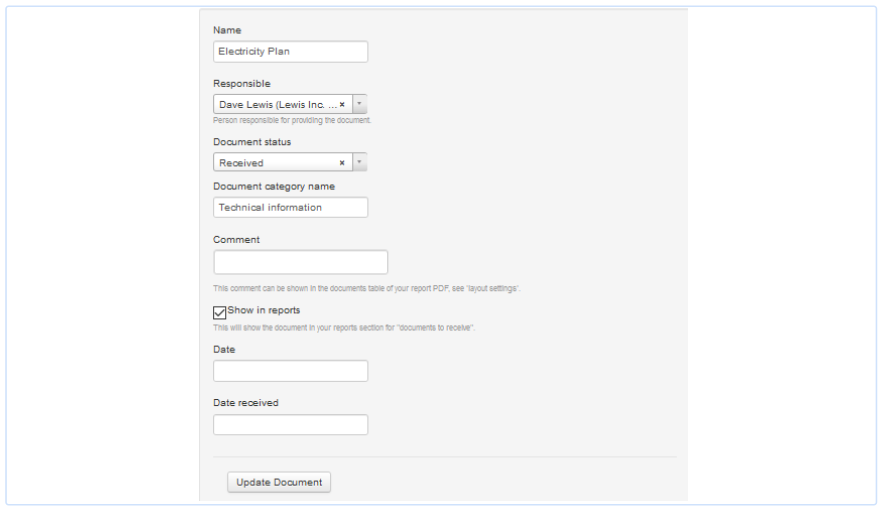
You can also upload additional documents yourself, for example, if you received them via email.

You can change all settings for this specific document by clicking on the "edit" button.
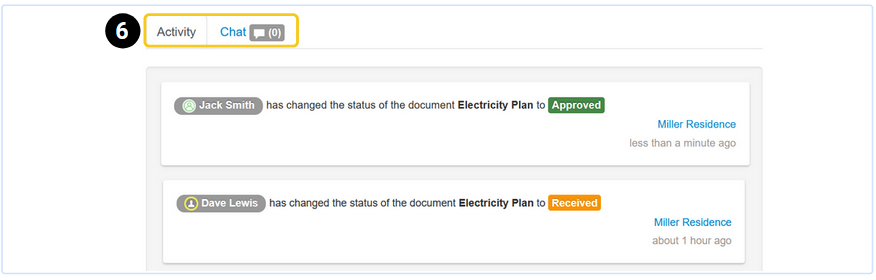
Scrolling down, you'll see the activity log and chatbox for this document.
TIP: use this dashboard in your online account to get a cross projects overview of documents to receive.
Also read:
Or watch this video:
Questions? Support@archisnapper.com.